

Choco-Peanut Butter Chip Cookies 11/15/15
Aaaaaand another cookie recipe! Sorry, not sorry! Obviously cookies are amazing (Cookie dough is too! Mmmmm....) so I had to add another set of cookies to the blog. These ones are made with super delicious chocolate chips, plus.....
--wait for it--
......peanut butter chips! I love love LOVE the combination of peanut butter and chocolate, and the peanut butter chips in general are really good (I ate at least half the bag while I was waiting to find a nice recipe to try... Sorry Mom!). These cookies are a must-have if you are a Reeses Peanut Butter Cup lover! Or just a cookie lover. Either works! Tell us what you think of them in the survey below!
- 1/4 cup plus 2 tbs canola oil
- 1 1/3 cup granulated sugar
- 2 tsp vanilla extract
- 2 large eggs
- 2 1/2 tsp baking powder
- 1 2/3 cup all purpose flour
- 3/4 cup chocolate chips
-3/4 cup peanut butter chips
Preheat the oven to 350 degrees Fahrenheit. In a large bowl, use a mixer to cream the canola oil and granulated sugar. Add the vanilla and the eggs. On low speed, slowly add the baking powder and flour and mix until fully incorporated. Stir in the chocolate and peanut butter chips. Scoop tablespoonfuls of the cookie dough and place them about 2 inches apart on a baking sheet. Bake for about 10-15 minutes. Enjoy!
Fluffy Snickerdoodles 11/11/15
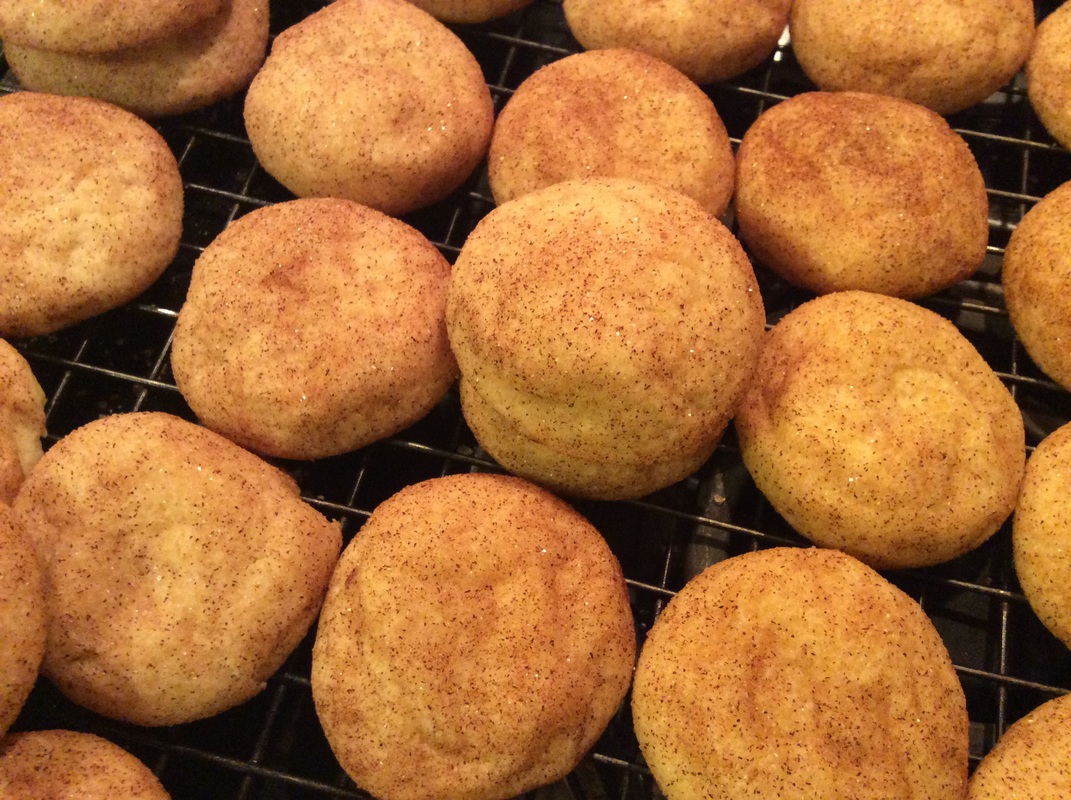
Another cookie recipe coming your way! Out of all the cookies in the world (that I've tried so far!), I'd have to say Snickerdoodles are one of my very favorites. There's just something about the cinnamon-y, sugary taste that I absolutely love. Cinnamon-oatmeal cookies are awesome too, so maybe I'm just addicted to cinnamon? Probably. Anyway, back to the cookies! This recipe gave me the fluffiest Snickerdoodles I had ever eaten in my entire life. I'm not kidding! It was amazing. This recipe is definitely going to be one of my go-to's for Snickerdoodles. Try it out yourself and tell us what you think in the survey below!
Yield: About 4 dozen cookies.
For the Cookies:
-1 cup unsalted butter, softened
-1 2/3 cup granulated sugar
-2 large eggs
-2 tsp vanilla extract
-3 cups all-purpose flour
-3 tsp baking powder
-1/2 tsp cream of tartar
For Rolling:
-1/2 cup granulated sugar
-4 tsp cinnamon
For the Cookies:
Preheat oven to 350 degrees Fahrenheit. With an electric mixer, combine the butter and sugar until well combined and creamy. Add the eggs and vanilla and beat until it's light and fluffy. Add the flour, baking powder, and cream of tartar and beat on low speed until fully combined. Scoop dough into mounds approximately the same size (each cookie is one tablespoon of dough).
For the Rolling:
In a small bowl, combine the 1/2 cup of granulated sugar and 4 teaspoons of cinnamon. Roll each mound of dough in the mixture until completely covered. Place the mounds of dough on a baking sheet spaced about 2 inches apart, and bake for 10 minutes. DO NOT flatten the cookies, or they won't be as fluffy! When they are done baking, let them cool on a cooling rack for about 10 minutes before serving. Cookies will firm up as they cool. Enjoy!

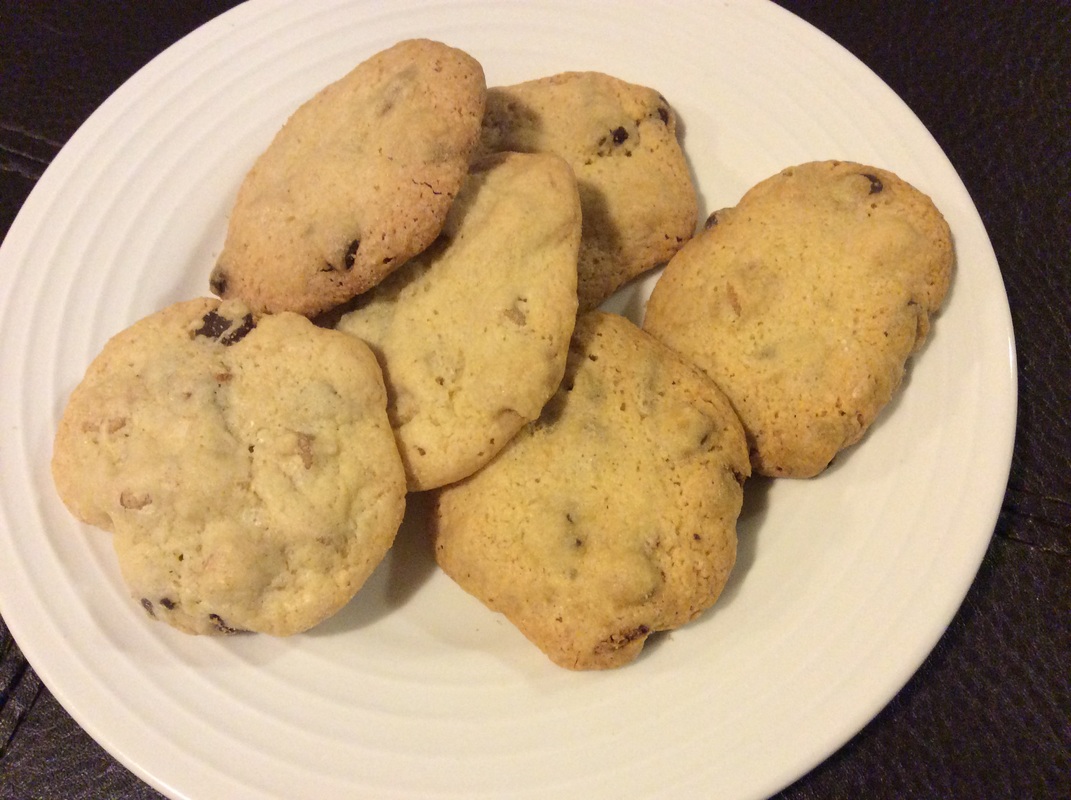
Classic Chocolate Chip Cookies 10/14/15
I feel that every blog needs a classic chocolate chip recipe and I've been hunting to find the perfect one! What makes the perfect cookie to me would be dough that is soft, buttery, and a tad bit sweet with sweet gooey chocolate chips. This recipe really displays that but may the search for the perfect cookie continue!
Ingredients
Make sure the butter is melted but not completely.
If dough is sticky then add more flour.
Source: http://pinchofyum.com/the-best-soft-chocolate-chip-cookies
I feel that every blog needs a classic chocolate chip recipe and I've been hunting to find the perfect one! What makes the perfect cookie to me would be dough that is soft, buttery, and a tad bit sweet with sweet gooey chocolate chips. This recipe really displays that but may the search for the perfect cookie continue!
Ingredients
- 8 tablespoons of salted butter
- ½ cup white sugar (I like to use raw cane sugar with a coarser texture)
- ¼ cup packed light brown sugar
- 1 teaspoon vanilla
- 1 egg
- 1½ cups all purpose flour
- ½ teaspoon baking soda
- ¼ teaspoon salt (but I always add a little extra)
- ¾ cup chocolate chips (I use a combination of chocolate chips and chocolate chunks)
- Preheat the oven to 350 degrees. Microwave the butter for about 40 seconds to just barely melt it. It shouldn't be hot - but it should be almost entirely in liquid form.
- Using a stand mixer or electric beaters, beat the butter with the sugars until creamy. Add the vanilla and the egg; beat on low speed until just incorporated - 10-15 seconds or so (if you beat the egg for too long, the cookies will be stiff).
- Add the flour, baking soda, and salt. Mix until crumbles form. Use your hands to press the crumbles together into a dough. It should form one large ball that is easy to handle (right at the stage between "wet" dough and "dry" dough). Add the chocolate chips and incorporate with your hands.
- Roll the dough into 12 large balls (or 9 for HUGELY awesome cookies) and place on a cookie sheet. Bake for 9-11 minutes until the cookies look puffy and dry and just barely golden. Take them out even if they look like they're not done yet (see picture in the post). They'll be pale and puffy.
- Let them cool on the pan for a good 30 minutes or so (I mean, okay, eat four or five but then let the rest of them cool). They will sink down and turn into these dense, buttery, soft cookies that are the best in all the land. These should stay soft for many days if kept in an airtight container. I also like to freeze them.
Make sure the butter is melted but not completely.
If dough is sticky then add more flour.
Source: http://pinchofyum.com/the-best-soft-chocolate-chip-cookies

Gooey Strawberry Bars 9/24/15
Although fall is here along with school and cooler weather, we all want to hold on to the last little bit of summer! If you're like me then along with lemonade and popsicles, strawberries always sound like the perfect summer treat! Here is the perfect ending of summer dessert!
Yield: One 9x13 pan
Ingredients:
1 box strawberry cake mix
1 egg
½ cup butter (melted)
8 oz. PHILADELPHIA Cream Cheese (1 bar)
2 eggs (beaten)
Sliced strawberriesis
For icing
Mix together powered sugar with either milk or water. Add ingredients together until amount and/or consistency is desired.
Instructions:
Grease a 9x13 pan and turn oven to 325.
Blend cake mix, 1 egg and butter until smooth.
Press into your greased 9x13 pan.
Blend cream cheese, 2 eggs, and powdered sugar until creamy and smooth.
Spread over your the first mixture in your pan.
Bake at 325 for 40-45 minutes or until edges are golden brown (middle may sink in a bit).
Top with powdered sugar, icing, or sliced strawberries.
Enjoy!
Source: http://lilluna.com/gooey-strawberry-bars/
Amazing Pumpkin Bars 9/13/15
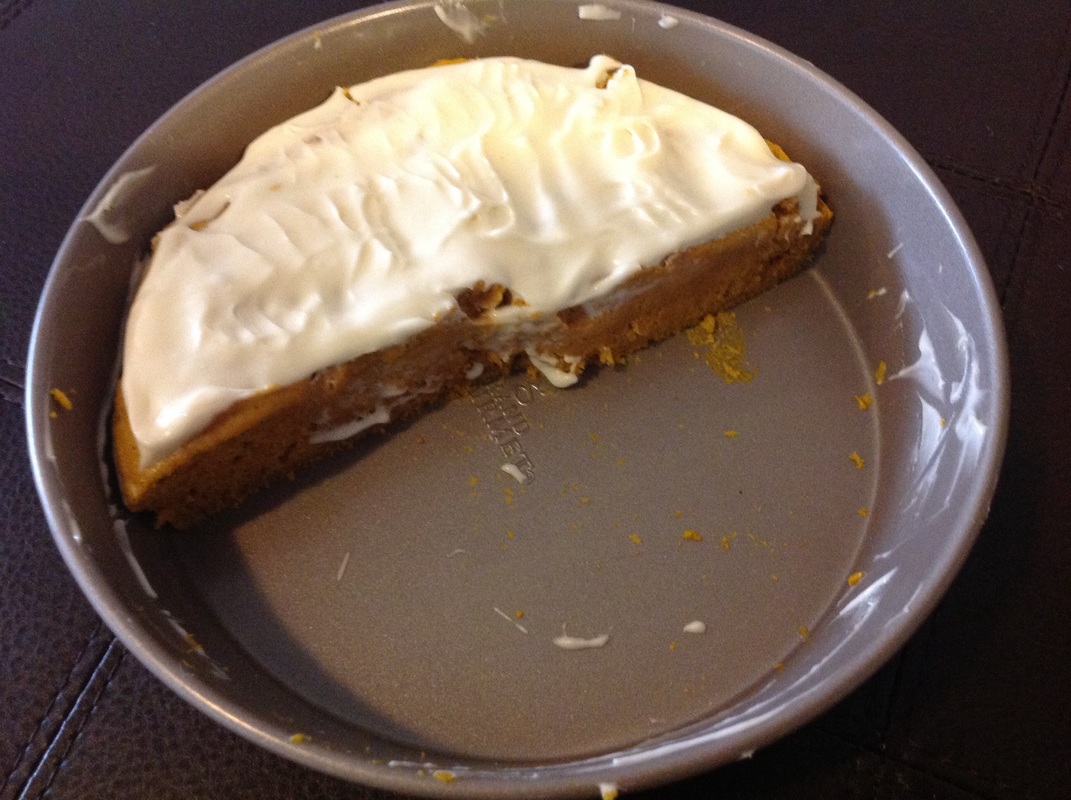
School has started, the leaves are changing, and the weather is getting colder. Fall is coming fast! It's the first weekend of the first week of school, so I've decided to do absolutely nothing until Monday. Besides doing my homework....... and baking something, obviously! It's the season for autumn treats, so I bought a can of pumpkin at the store and tried to figure out what I was going to make with it. I was thinking pumpkin cookies (which I probably should make sometime, considering there are no cookie recipes on the blog..... I'll make some cookies next time!) but I decided to look around and try to find something I haven't made before. Then, I found this recipe: Pumpkin Bars! They taste amazing! The cake is dense and almost fudge-like, and the cream cheese frosting is super delicious. I hope you enjoy this recipe! Please tell us what you think in the survey below.
Yield: One 9-inch round pan of Pumpkin Bars
For the Bars:
- 2 cups flour
-1 cup sugar
- 1/4 tsp ground ginger
- 2 1/2 tsp baking powder
- 1/8 tsp ground cloves
- 1 tsp cinnamon
- 2 eggs
- 1 tsp vanilla extract
- 1/2 cup oil
- 1 (15 oz) can of pumpkin
For the Frosting:
- 4 oz cream cheese
- 3 tbsp softened butter
-1 cup powdered sugar
- 1 tsp vanilla extract
- 1 tsp milk
Preheat the oven to 350°F. Grease a 9-inch round pan and set it aside. In a large bowl, whisk together flour, sugar, ground ginger, baking powder, ground cloves, and cinnamon. Add eggs, vanilla, oil, and pumpkin and beat until fully incorporated. Pour the mixture into the pan and bake for 20-25 minutes or until a toothpick inserted in the center comes out clean. While the pumpkin bars are cooling, make the frosting. Using an electric mixer, combine the cream cheese and butter until smooth. Add the powdered sugar, vanilla, and milk and continue mixing. When the frosting is done, spread it evenly on top of the pumpkin bars. Enjoy!
Creamy Pumpkin Cheesecake 8/9/15
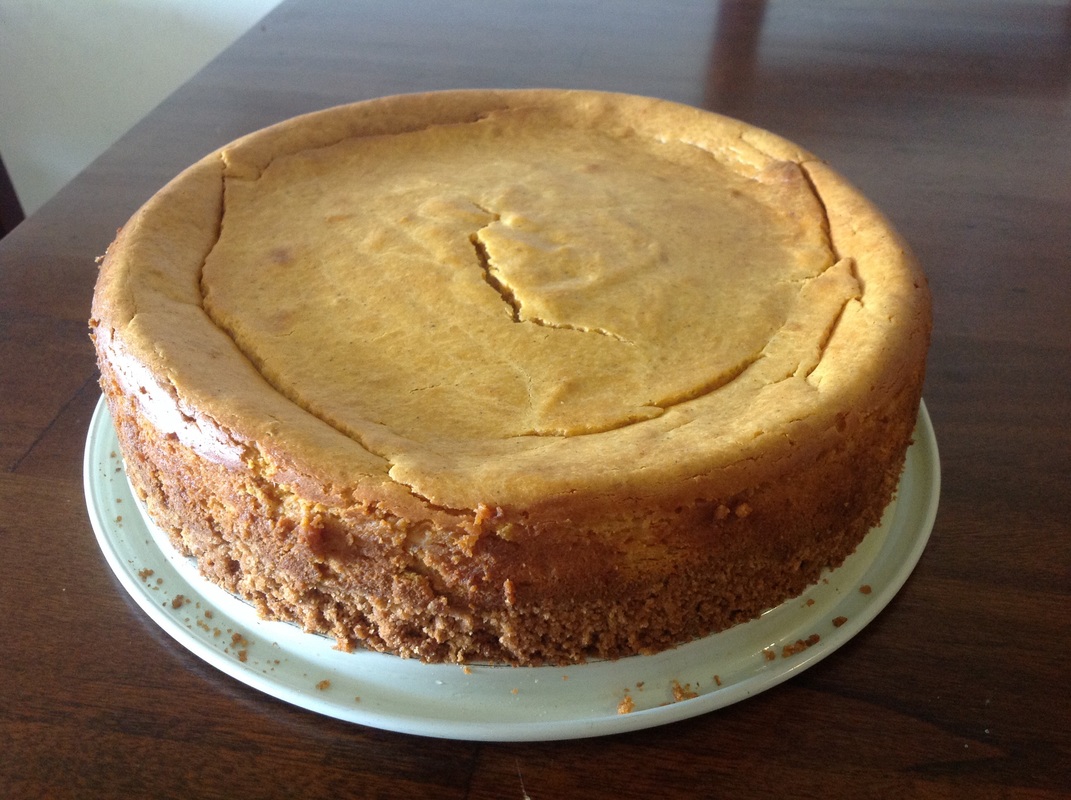
Hey guys! Sorry we haven't posted in a while. A very, VERY long while (I'm getting guilty just thinking about it). I haven't had much motivation to make anything, but that changes now! Today is my dad's birthday, (Happy Birthday Dad!!!!) and usually for my dad's birthday my mom and I make him a cheesecake. He's probably come to expect this every year so it's not much of a surprise, but he likes it, we like it, and it's cheesecake. In my opinion, cheesecake is great to enjoy anytime, special occasion or no, so here is a recipe for Creamy Pumpkin Cheesecake that you can use to make someone you love a little something special for their birthday. Or, you know, to help you get over a bad day. Or something like that.
Yield: One Creamy Pumpkin Cheesecake
For the Crust:
- 1 1/2 cup graham cracker crumbs
- 5 tbsp melted butter
- 1 tbsp sugar
For the Filling:
- 1 cup sugar
-3 (8 oz) packages cream cheese
- 1 tsp vanilla extract
- 1 cup canned pumpkin
- 3 large eggs
- 1/2 tsp cinnamon
- 1/4 tsp nutmeg
- 1/4 tsp allspice
Whipped cream is optional, but honestly, who would pass up on whipped cream?????
For the Crust:
Preheat the oven to 350°F. In a medium bowl, combine graham cracker crumbs, 1 tbsp sugar, and melted butter. Make sure that all the crumbs are completely coated with butter, but don't mix too much or the crust will turn into a paste. Keep it crumbly, people. Press the crumbs into the bottom and partway up the sides of a spring-form pan. *NOTE* You don't have to use a spring-form pan, but it makes it a lot easier to get the cheesecake out once it's finished. Bake the crust for 5 minutes, then set it aside.
For the Filling:
In a large bowl, combine cream cheese, vanilla extract, and 1 cup sugar with an electric mixer until smooth. Add eggs, pumpkin, nutmeg, cinnamon, and allspice, and continue beating until well combined and creamy. Pour the filling into the pan and bake for 60-70 minutes. Take it out of the oven and allow to cool to room temperature, then put it in the fridge. Once it's completely chilled, cut the cheesecake and enjoy! Use as much whipped cream as you need (or.... y'know, WANT).
Bubble Biscuit Pizza 5/23/15

My best friend and co-editor, Krista, came to stay the night this weekend! We had tons of fun, from photo shoots on the balcony to staying up late watching TV. We had ice cream and a delicious dessert pizza (sorry we couldn't post the recipe... we didn't get a picture!) For dinner, we decided to make a yummy pizza recipe to put on the blog! This pizza is the best I've ever had. It tastes just like the pizza biscuits my mom use to make for me. I hope you enjoy this recipe! Tell us what you think in the survey below.
Yield: One pan of pizza
- 2 cans Pillsbury Grands Homestyle Biscuits
- 2 (15 oz) cans/jars pizza sauce
- Pepperoni or other toppings (optional)
- Shredded mozzarella cheese (as much as you want)
- Parmesan cheese, grated (as much as you want)
Preheat the oven to 400 degrees Fahrenheit, and grease a 13x9 inch baking dish. Cut the biscuits into quarters and place in the greased dish. Top with the pizza sauce and other toppings, if desired. Bake for 20 minutes, then remove from the oven and sprinkle the cheeses on it. Bake for 5 more minutes, then take it out and let it cool. Enjoy!
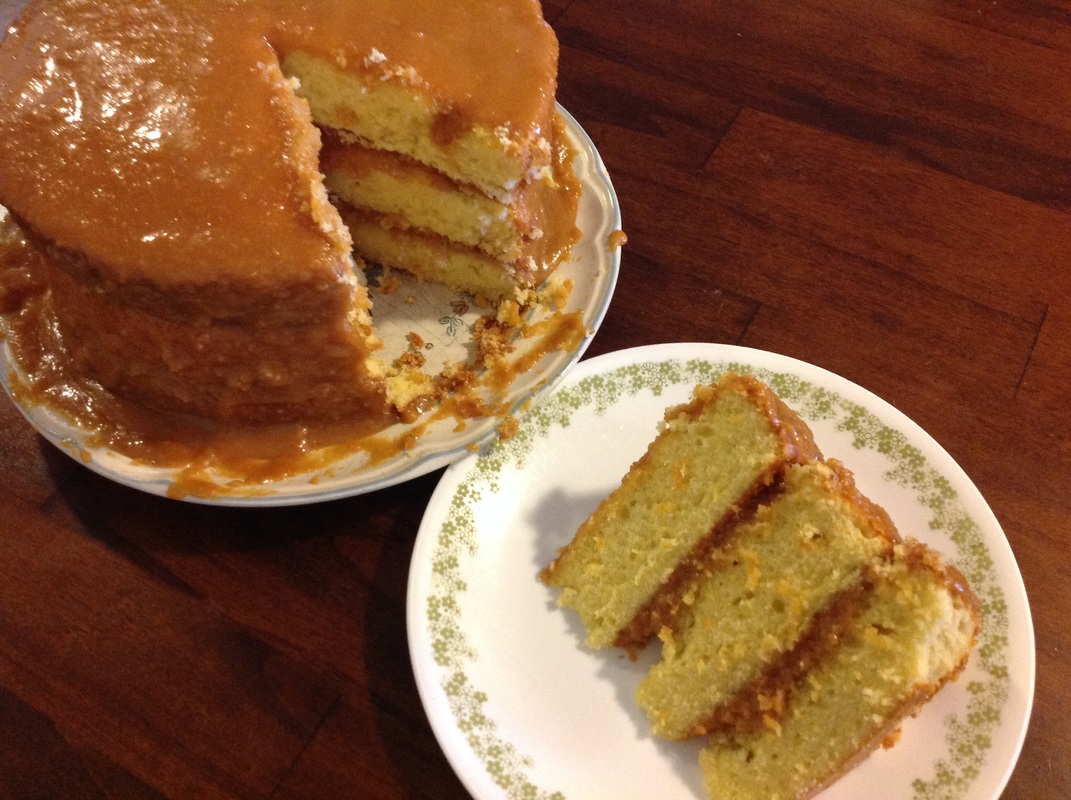
Deliciously Rich Caramel Cake 5/15/2015
I have some exciting news: for this recipe, we made our first baking how-to video! We'll put it below the recipe directions if you want to watch. :)
So today our recipe is.... Caramel Cake! It's a little different than most cakes I usually make, since this one has three layers instead of two. Nonetheless, it's amazing! It took a long time to finish, but 1) I had two new nonstick cake pans that worked AWESOMELY and 2) it was totally worth it, so I didn't care how much time it took. As long as I have a cake by the end, I'm good! This cake is just the perfect amount of sweet, and the real caramel sauce just puts the icing on the cake (pun intended).
This cake is really rich (can you tell I like rich desserts???) so a small slice will still fill you up.... unless you want a big slice, because that will work too! Watch our baking video and tell us what you think of the recipe in the survey below.
Yield: One cake
For the Cake:
- 2 sticks unsalted butter
- 1/3 cup vegetable oil (canola oil will work too)
- 2 1/2 cups granulated sugar
- 3 cups cake flour
- 6 large eggs plus 2 large egg yolks
- 1 tsp baking powder
- 1/2 tsp salt
- 1 cup sour cream
- 2 tbsp pure vanilla extract
For the Icing:
- 1 1/2 sticks butter
- 2 (12 oz) cans evaporated milk
- 2 cups granulated sugar
- 2 tsp vanilla extract
For the Cake:
Preheat the over to 350 degrees Fahrenheit, and grease three 9-inch cake pans. Cream butter, oil and sugar on high in a large mixing bowl until it's light and fluffy, about 5-6 minutes. Mix in eggs and egg yolks on medium speed until well incorporated. Beat in vanilla extract. In a medium sized bowl, mix cake flour, baking powder and salt. Alternate adding in the flour mixture and sour cream, beating on medium speed until mixed through. *NOTE* Do not over mix. Pour the batter evenly into the three cake pans. Bake for about 23-30 minutes or until fully baked. *ANOTHER NOTE* Don't over-bake these cakes! Let them cool for a bit, then take them out of the cake pans and let them continue cooling on wire racks for about 10 minutes. Wait until they are completely cooled to ice.
For the Icing:
Add sugar, butter, and evaporated milk to a saucepan and melt over medium heat until everything is melted together. Turn it down to medium to low heat and stir periodically for 1 1/2 to 2 hours. Keep an eye on it to make sure it doesn't burn. The caramel is done when it thickens and has darkened to a nice golden brown color. It should also be able to coat the back of a spoon. Turn off the heat and stir in vanilla extract. Let it cool for about 15 to 20 minutes before icing.
When everything is cooled, put some caramel icing between each layer of the cake and most of it on top. Spread it evenly. Enjoy!
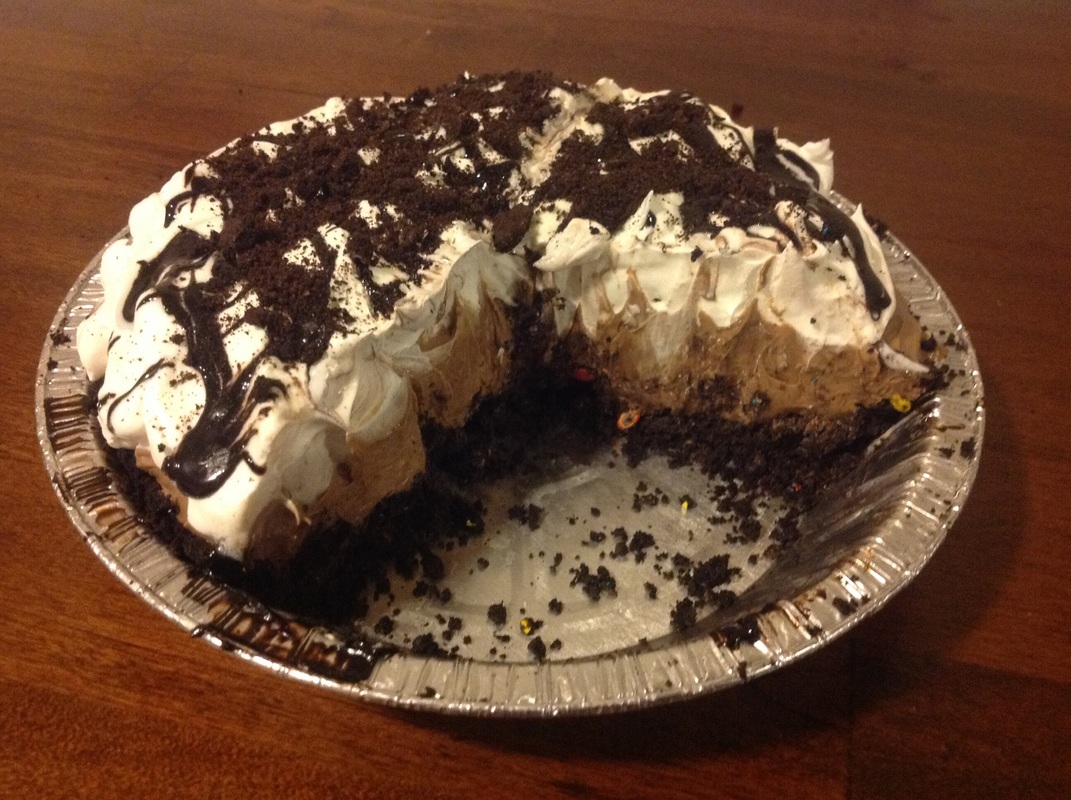
Minty Chocolate M&M's Cheesecake (with Oreo crust!) 5/10/2015
Happy Mother's Day to all the great mothers out there! Today is your day, so sit back and relax! Or.... make yourself this deliciously rich cheesecake. :)
Today I wanted to do something amazing for my mom, something she wouldn't expect. I wasn't quite sure what I was going to do, but I knew one thing: I wanted to make her cry. Not sad tears, but omg-i'm-so-happy tears.
I ran my plan by my co-editor and best friend Krista, to which she replied: "Aww! You always make her cry!" followed by a quickly added "In a good way." Krista, I am still laughing about that at this very moment. XD
Since my mom works until very late at night, I stayed up and made her this cheesecake from a recipe I found. I tweaked the recipe quite a bit though, so I'd say this is my own concoction. Anyway, while it was in the freezer (since this is a freezer cheesecake) I worked on the most heartfelt card that was sure to make my mom sob her tears of joy. At around midnight-thirty ('cause who wants to say "twelve-thirty"? Pshh.), my mom walked through the door. I shouted 'Happy Mother's Day' and presented her the card. I watched as her face went from interested to serious as she read my letter, and then came the tears. Mission accomplished.
We both enjoyed a midnight-ish snack of cheesecake, which, by the way, was AMAZING. It was really rich and minty and chocolaty and just perfect. So perfect, I had to share it with all of you. Be warned: like I said before, this cheesecake is very rich. A big slice will seem pretty nice but will be a lot harder to finish than a smaller slice. Tell us what you think in the survey below.
Yield: One cheesecake
- 2 cups crushed Oreo cookies (Not the cream, unless you really want to!)
- 1/3 cup mini M&M's
- 3 1/2 tbsp melted butter
- 11 ounces of cream cheese, softened
- 2/3 cup granulated sugar
- 1 1/4 cup and 1 tbsp of Andes Mints, melted
- 1 tsp vanilla extract
- 2 1/2 cups thawed frozen Cool Whip, divided (the kind in the tub, not the can)
- About 2 tbsp dark chocolate fudge topping, heated until liquid-y
Preheat oven to 325 degrees Fahrenheit. In a medium bowl, combine Oreo cookie crumbs, mini M&M's, and butter. If you have leftover cookie crumbs, set them aside to decorate the cheesecake later. Press into the a 9-inch pie plate, covering the bottom and the sides. Bake for 10 minutes, then cool completely on a wire rack. In a large bowl, beat the cream cheese and sugar until light and fluffy. Add the melted Andes Mints, vanilla extract, and 1 cup Cool Whip. Spread the cream cheese mixture onto the crust. Take the remaining 1 1/2 cup Cool Whip and spread it evenly on top of the cheesecake. Take the dark chocolate fudge topping and drizzle it on top. If you have leftover cookie crumbs, sprinkle them on top of the cheesecake. Put the cheesecake in the freezer and until firm and ready to serve.
Pumpkin Pie 5/4/2015
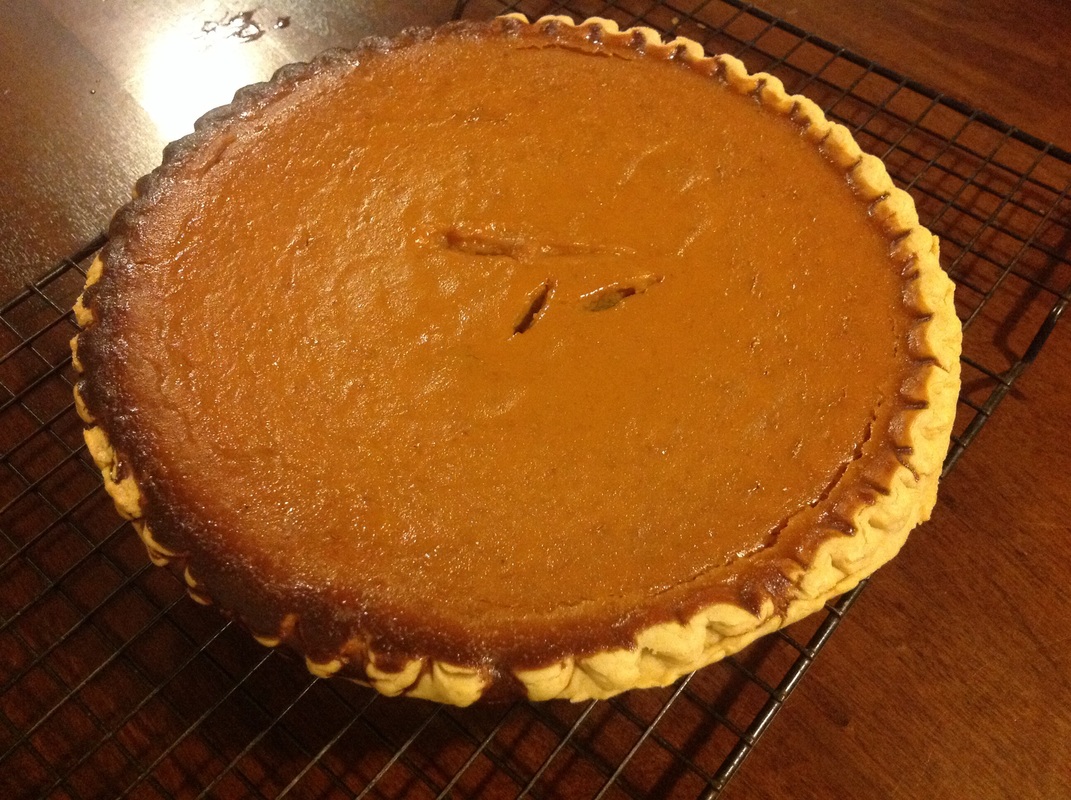
I had some more pumpkin mix left over, and since pumpkin is amazing no matter what time of year it is, I decided to make a pumpkin pie. Nothing can beat its classic cinnamon-y and pumpkin-spice-y deliciousness! But since I was feeling lazy today, I made it with canned pumpkin pie mix. I know......it's shameful. Although pie made from scratch is usually better than from canned mix, this will still taste good, I promise! There's a secret ingredient, too. See if you can spot it! Tell us what you think in the survey below.
Yield: One pumpkin pie
- 1 30 oz. can of pumpkin pie mix
- 2/3 cup evaporated milk
- 2 large eggs, beaten
- 1/4 cup maple syrup (you can add more if you want to)
- 1 unbaked 9-inch deep-dish pie shell
- Whipped cream (optional)
Preheat oven to 425 degrees Fahrenheit. Mix pumpkin pie mix, evaporated milk, and eggs in a large bowl. Stir in maple syrup. Pour the mixture into the pie shell and bake for 15 minutes. Then reduce the temperature to 350 degrees Fahrenheit and bake for an additional 50-60 minutes, or until knife inserted near center comes out clean. Cool on wire rack for 2 hours. Enjoy! Whipped cream on top is optional but amazing!
Mega-Mini Cocoa Pumpkin Muffins 5/3/2015
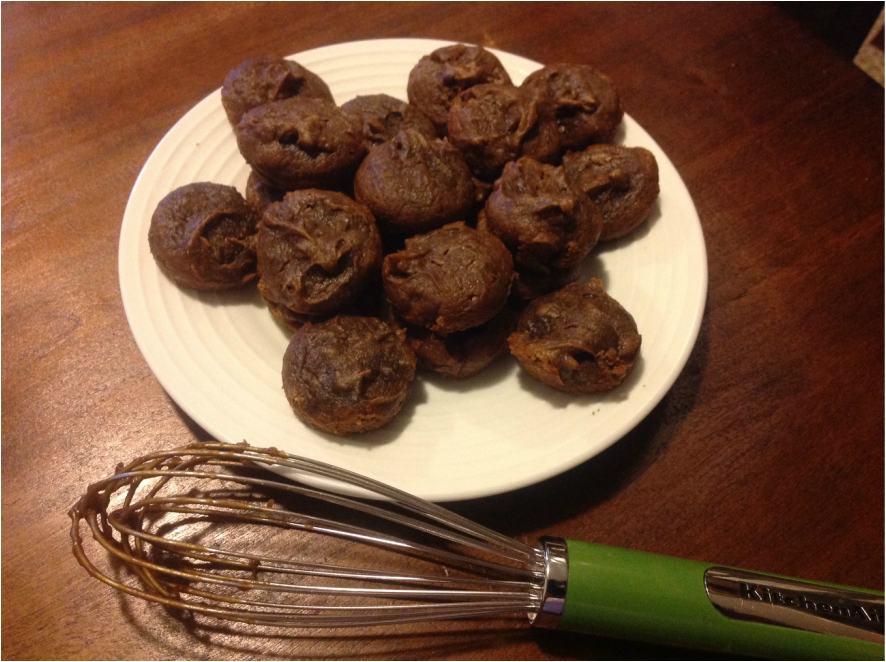
Yay! First blog post! For this I decided to make a yummy pumpkin recipe. Honestly, this was entirely experimental. I had no idea how this would turn out, but I think they were pretty good. The muffins are bite sized and perfect for when you want a quick snack. The pumpkin, peanut butter, and chocolate all combine to make a very moist (sorry to those of you who don't like the 'M' word) and delicious muffin. And did I mention that they're flourless? Here is the recipe! Tell us what you think in the survey below.
Yield: About 20 mega-mini muffins
- 1/3 cup canned pumpkin puree
- 1 large egg
- 1/2 cup peanut butter
- 5 1/2 tbsp granulated sugar
- A pinch of baking soda
- 1 tbsp unsweetened cocoa powder
- 1/4 cup mini chocolate chips
Preheat oven to 350 degrees Fahrenheit, and grease mini muffin pan (or use those muffin/cupcake cups). In a medium mixing bowl, stir together all the ingredients. Fill the muffin molds about halfway full, and bake for 12 minutes or until toothpick inserted comes out clean. Let the muffins cool on a wire rack for a few minutes and enjoy!
